ProTools Skills Reference
Intermediate-Level Skills
Setting Grid Mode. -back-
Grid mode can be set to help organize and arrange the audio regions of your ProTools session.
- You can have the grids set to draw; bar/beats, min./sec, samples, and even time code and frame rates.
- Tools and regions snap to the grid lines when working in grid mode.
Put ProTools edit window into Grid Mode.
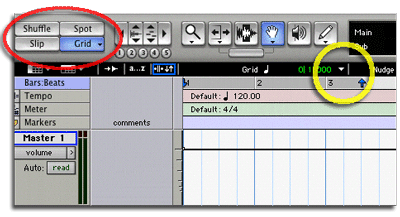
- First set the edit window in Grid mode by clicking once on the Grid button (show in red ellipse).
- Select the Grid mode setting, by clicking the small arrow shown in the yellow circle.

Set grid resolution.
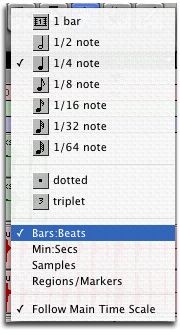
- A pop up dialog box will appear where you can select the grid organization (bars:beats, Min:Secs, etc..) and also the grid resolution (1/4 note, 1 sec, 1000 samples, etc...).
- The picture above already show the grids set to bars:beats at a 1/4 note resolution shown in the picture below.

ProTools time line.
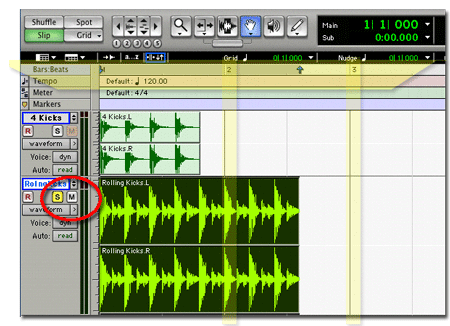
- You can set the edit window to show information on the timeline. By selecting the small arrow to the right shown in the red circle you can change what is shown on the timeline (tempo, meter and markers are shown. The small arrow to the left will show track information (i/o, inserts, etc...).
- The blue ellipse shows tempo of 120 beats per min., and 4/4 time.
- the current time window shows that the now-line (play head) is at bar 1, Beat 1, and 000 fractions of the beat.

After setting the Grid mode for your organizational needs, the tools will snap to the grids. Grid mode is handy because you can make accurate adjustments of audio regions without having to change your time scale zoom level.
Finding the beat of a looped sample. -back-
The beat and duration of one sample can be used to set the tempo for your ProTools Session.
- After You have set your grid mode, import a loop sample into your session (use import to track under the file pull down menu).
- See how the timeline shows the bars (shown with yellow highlights). The Rolling Kicks sample shown in this example does not have the same tempo as the session and therefor the region does not conform to the bar lines.

Finding how many beats are in your sample.
- Set the playback to loop play (button on the Digi003 mixer)
- Select the region using the grabber tool. Select a file that has a tempo or speed that you would like to use in your loop mix. Use something that has a basic rhythm to it, like a basic drum beat.
- Set the track you would like to use to set your tempo.

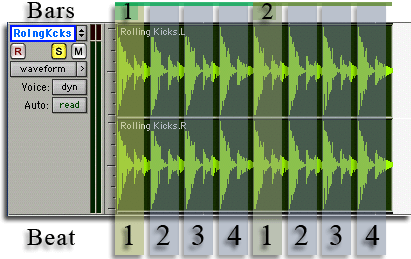
- Play the sample and count. You should find a number of counts that when looped comes out the same over and over. If you find eight pulses or counts, chances are that you can group those counts into two groups of four. Think about music organization when making these decisions.
- The example above has been broken down into two bars of four beats. Soon you will use this information for analysis of the selected region.
Identify Beat function -back-
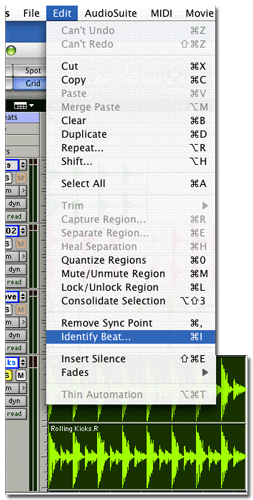
Select "Identify Beat...".
- Make sure that the selected region is placed at the vary start of the track (at zero time or bar 1, beat 1 on the time line)
- Under the edit pull-down menu, select the "Identify Beat..." function.

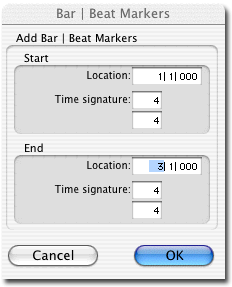
- A dialog box will appear, set the start and end parameters to match the count you found in the selected region.
- Above we had a count of eight that can be grouped into fours, this would be 2 bars of four beats.
- The dialog box would be set to start on location 1-1-000 (bar, beat, fraction) and the time signature would be 4/4.
- The end would reflect the full duration of the region in bars and beats. Two full bars, so the location is 3-1-00 and time sig is 4/4. Think of this spot as where the next loop would start.

The tempo setting of the session will be change according to the analysis of the audio region.
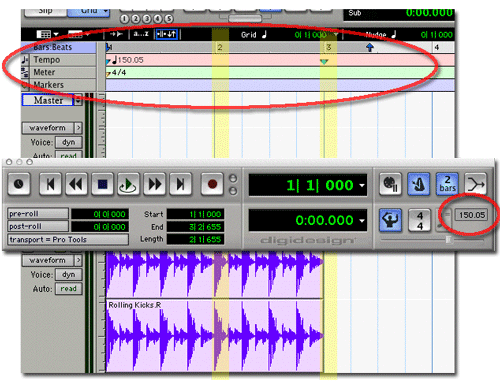
- The new tempo is shown on the timeline and in the tempo section of the transport bar (shown in red).
- The grid lines now match the temp or pulse of the selected audio region and tools will snap to bars and beats that that relate the audio sample.
- bar two and three are highlighed in yellow. You can see that the attack of sound in the region lines up with the bars and beats on the time line.
Time Compression and Expansion TCE -back-
The Time Compression and Expansion (TCE) tool can be used to adjust the duration of an audio region while maintaining its pitch and feel characteristics. Using TCE you can force loops to conform to you tempo requirements.
- This process will actually create a new audio file when adjustment are made, so the original should still remain untouched in the audio file list on the right of the edit window.
- Select the TCE tool by clicking on the selection tool (red ellipse) and holding down the mouse.
- A pop up menu (blue ellipse) will let you toggle between the selection tool and the TCE tool.
- After selection a watch like icon (yellow ellipse) will replace the ordinary selection tool icon.

Find the beat pattern of the region that you would like transform.
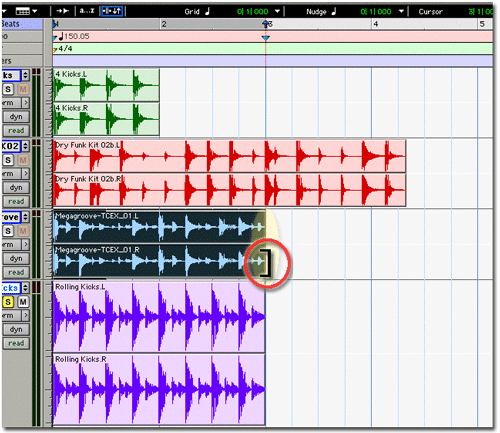
- Below you can see that the "Megagrove" track has eight beats. This is the same number of beats as the region that we used to set the tempo of the session (see Identify Beat).
- Knowing that this region should take the same amount of space we can force it to match out session tempo and fit in two bars on the timeline using the grid to snap our adjustment to.

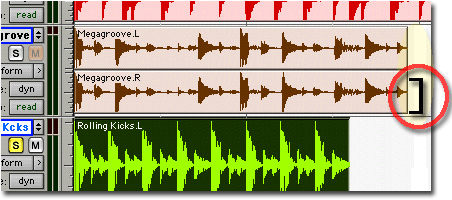
- Using the TCE tool hold the curser in the track of the region to be adjusted (Red ellipse highlight). Click and hold on the region. Move the duration to include the two full bars, the tool will snap to the grid when in grid mode.

- Let up on the mouse when the duration is correct.
- ProTools will process the region and the new duration should show some visible matching of attacks between the adjusted region and the region that was used to set the tempo of the session.

Import QuickTime Move -back-
Quick Time once imported, will be locked to the timeline. The movie can be seen in a floating window.
- Before you import the movie; move the QT file into your session folder and create a stereo master fader.
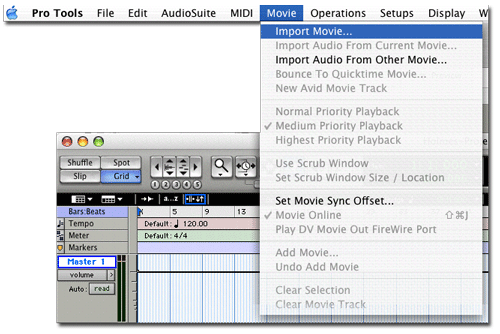
- Select "Import Movie..." from the movie pull down menu.

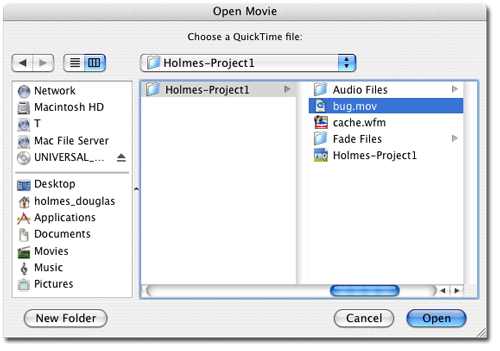
- Find the Quick Time movie you would like to import.
- Click Open

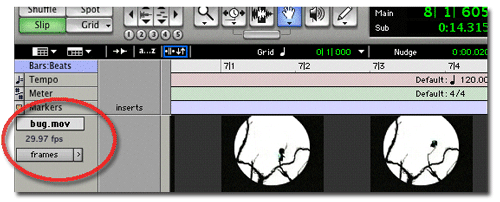
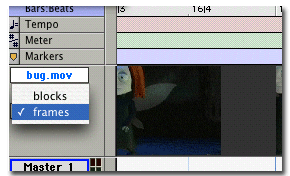
- When the movie is loaded you will see frames or blocks that represent the movie on the time line.
- The movie track is labeled the name of the movie and the frame rate is displayed (red highlight).

- You can toggle between frames and blocks by clicking on the word.
Bounce Audio to a Quick Time Movie -back-
Once your done with your mix, you can create a new Quick Time file with a bounce of your multitrack.
- Select the full audio duration of your sound design on the timeline.
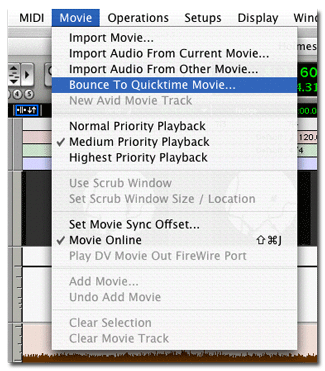
- Select the "Bounce To Quicktime Movie..." from the movie pull down menu.

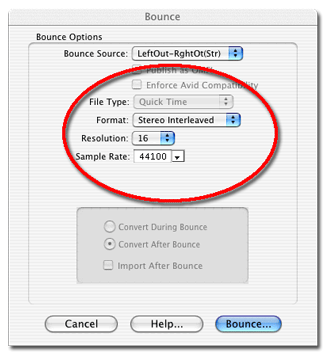
- Set the pup up "Bounce" dialog box.
- Click bounce.

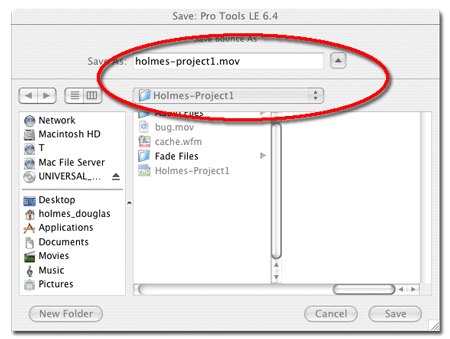
- Name and choose a location for the new file. Do not try to write over you source material (choose a unique name).
- Click save.
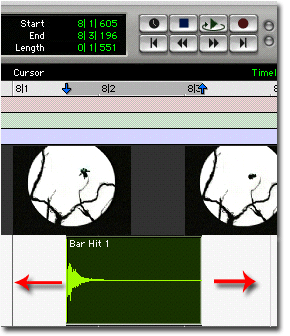
Nudge is a keystroke that can be used to move an audio region horizontally in the track. The nudge level can be set to small or larger movement steps.
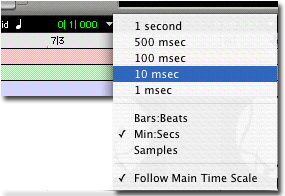
- Click the small arrow to access the pop up menu with nudge setting.
- set to time scale to Bars:beats, Min/Secs, Samples, and even frames/timecode.
- open the dialog box once again, and set the fine interval of nudge.

- These setting help when trying to sync attacks for audiovisual accuracy

- Once the Nudge level is set you can select an audio region and then use the + and - keys on the number pad of your computer keyboard to move the region.
Inserting Effect Processors -back-
Inserting effects into a track can be done in the mix window as well as in the arrange window. In the arrange window you must show the inserts in the track options to access the inserts.
- Click the small arrow to access the track options pop up menu, and select "Inserts View."

- The inserts view will be to the left of the track name. Click on one of the track inserts to access the effects pop up menu.
- select the appropriate Processor you need.

- To remove a Processor from a track select "no insert" from the pup up menu shown above.
![]() -back-
-back-